




Email: order@longwearparts.com

Product

Home       Other    Bucket


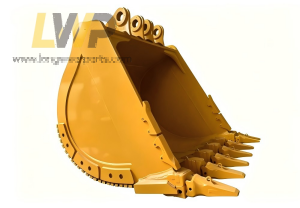
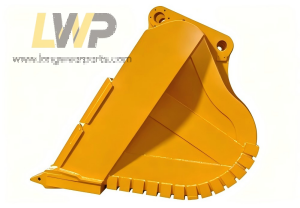
Hitachi giant mining excavator bucket for EX1200/EX1900/EX2600

Products information:
1)Bucket body material: Q355 / Q460 / Q690 +NM400 / NM 500/HARDOX500;
2)Attachments: rock teeth, adapters, side cutters, wing protectors, side wearing plates, back wearing bars, lip protectors, heel shrouds;
3)Outstanding Feature:customized design & color;
4)Package: packed in strong pallets;
5)Working Condition: strongest among the buckets above, suits the most extreme construction conditions,highly abrasive cases such as severe rock, providing highest level wear prot

Product Description:

China Long wear parts@ Hitachi extreme duty rock bucket /Hitachi reinforced rock bucket/Hitachi extreme service rock bucket /Hitachi Excavator mining rock bucket /Hitachi custom excavator bucket are built to withstand harsh working conditions, greatly reducing maintenance costs and extending service life.

We use high-grade, abrasion-resistant steel (such as Hardox 450/450 or equivalent) in high-wear zones—the floor, side cutters, and cutting edge. For extreme applications (granite, basalt, or slag), we offer optional wear packages with bolt-on wear plates and replaceable shrouds that extend service life by up to 50% compared to standard mild steel buckets. Every bucket is also fitted with our signature wear indicator system so your maintenance team can plan replacements proactively, not reactively, eliminating unplanned downtime.


NM450 Wear-resistant Steel HB420~470 Balanced toughness & wear resistance, no brittle fracture Rock excavation, aftermarket replacement rock bucket (mainstream)
NM500 High Wear-resistant Steel HB470~530 Ultra wear-resistant, scratch-resistant, matched with reinforced structure Quarry, hard ore, long-term rock mining

In rock quarries and demolition sites, buckets face constant shock loading from falling boulders and hydraulic hammering. Our buckets are fabricated with double-walled construction at stress points (heel and side plate junctions) and reinforced with ribbed gussets. All critical welds are performed by certified welders and undergo non-destructive testing (NDT) to guarantee zero porosity or cracking. We also offer a full-wrap heel guard that deflects impact energy away from the bucket’s back plate—a common failure point in competitor products.

Automatic robotic full penetration welding ensures seamless welds and excellent structural stability. Double anti-rust paint coating protects buckets from rust during long-distance sea transportation.Whether you choose our OEM-spec line or our performance aftermarket series, every bucket carries a 12-month structural warranty against manufacturing defects in material and workmanship. 


Equipment type Bucket Model
Hitachi Tracked excavator - Giant mining excavator Hitachi EX800H-6 Bucket
Hitachi Tracked excavator - Giant mining excavator Hitachi EX1200-6 Bucket
Hitachi Tracked excavator - Giant mining excavator Hitachi EX1900-6 Bucket
Hitachi Tracked excavator - Giant mining excavator Hitachi EX2600-6 Bucket
Hitachi Tracked excavator - Giant mining excavator Hitachi EX3600-6 Bucket

Preparation Tools Pin shaft, cotter pin, hammer, pry bar, grease gun
Step 1 Park the excavator on flat solid ground, lower the stick arm to let the old bucket fully touch the ground, turn off the engine and release residual hydraulic pressure of boom.
Step 2 Knock out cotter pins on two connecting pins (bucket-stick arm & bucket-cylinder) with a hammer, push out two main pins by pry bar and remove the old bucket safely.
Step 3 Horizontally hoist the new bucket, align pin holes of bucket lugs with pin holes of stick arm and bucket cylinder, keep pin holes concentric.
Step 4 Install the upper pin (connect bucket cylinder & bucket ear) first, assemble cotter pin to lock the pin to prevent slipping.
Step 5 Install the lower main pin (connect stick arm & bucket lug), fit cotter pin for locking and fixing.
Step 6 Inject grease into grease nozzles of two pin shafts with a grease gun until clean grease extrudes from the gap between pin and lug.
Step 7 Start the excavator slowly, lift & lower the bucket repeatedly to test rotation flexibility, begin construction if no jamming occurs.
Important Notes 1. Never start the engine when your body is between stick arm and bucket to prevent clamping injury.2. Cotter pins must be fully installed; missing cotter pins may cause pin falling off and bucket dropping.3. Refill grease for pin shafts every 8 working hours to extend service life.


Inquiry:
Leave a message

 
Top